Tutorial: Creating a Protect Attachments rule (Emailflow)
In this tutorial we will show you how to create a Protect Attachments rule with Emailflow
1 - log in to https://dashboard-v3.mxhero.com/login
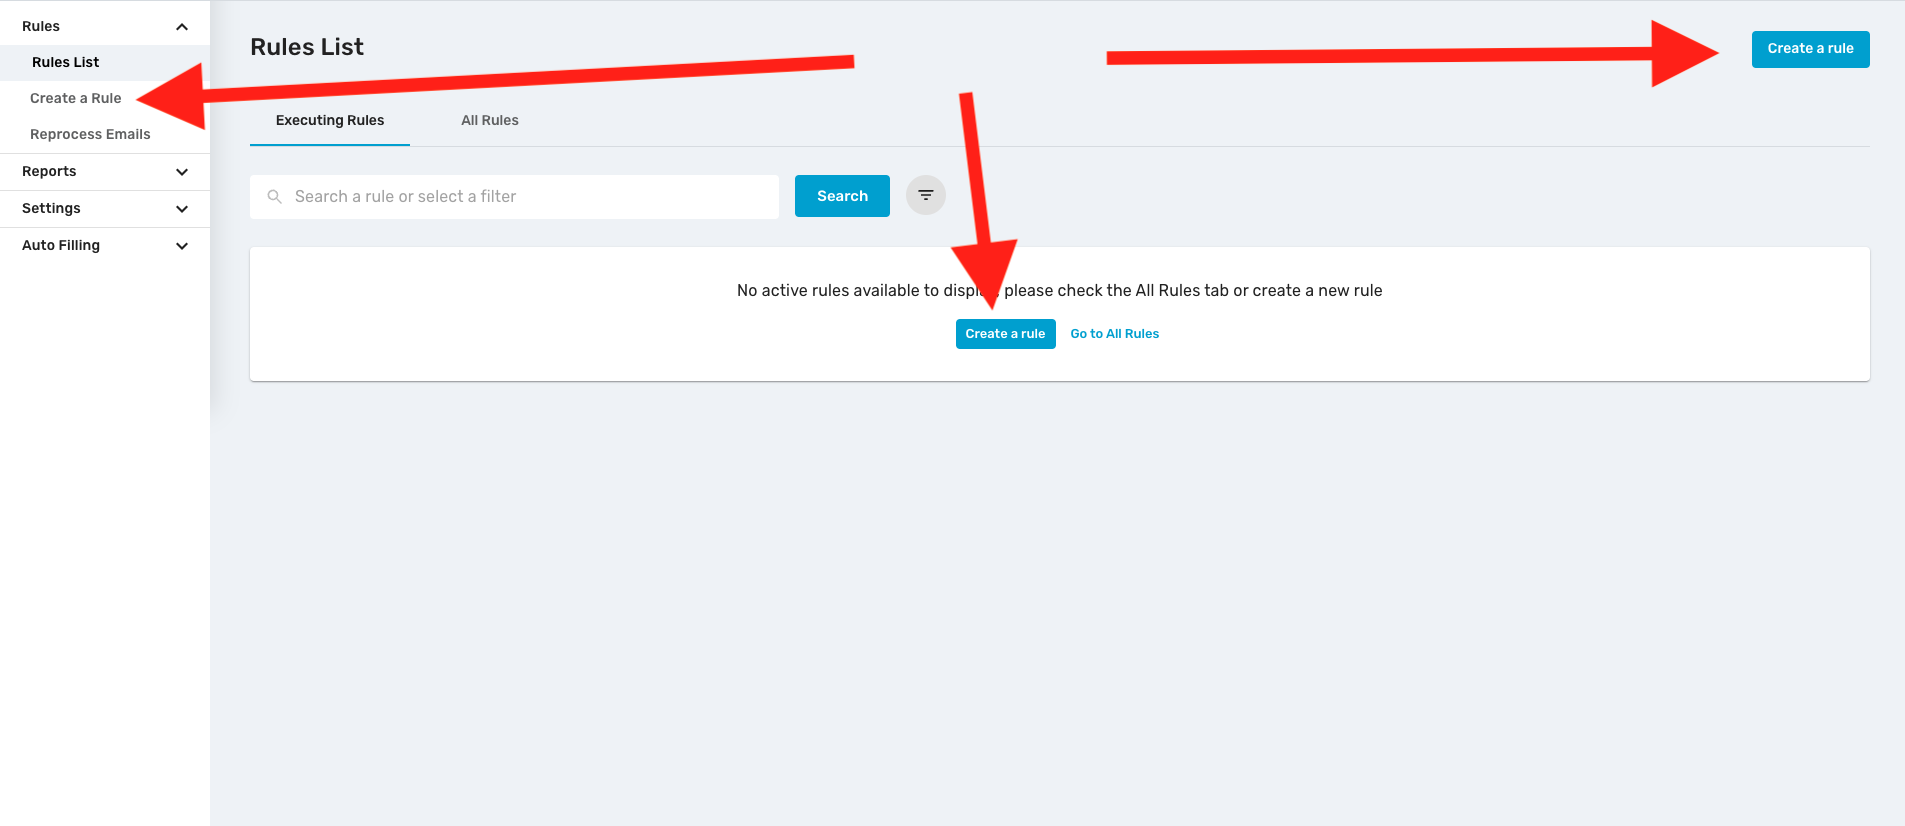
2 - In main screen, click any “Create a Rule” button
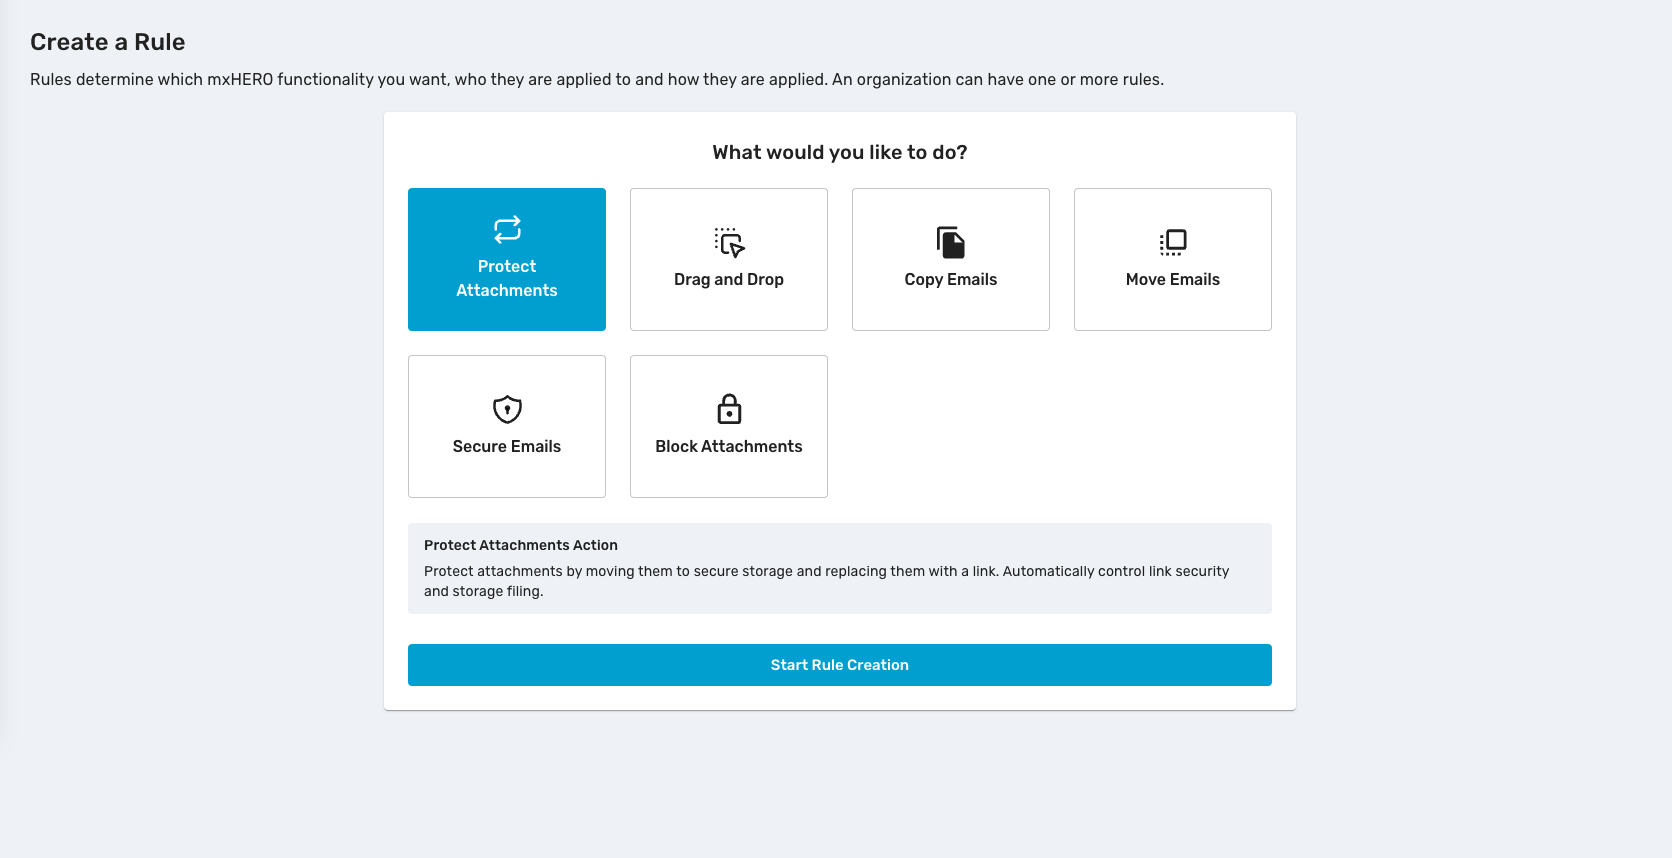
3 - Select the desired action and click “Start Rule Creation” button at the bottom
(in this example we will cover the process for a Protect Attachments action)
4 - Select what do you want to save (EML, PDF and/or Attachments), then Confirm.
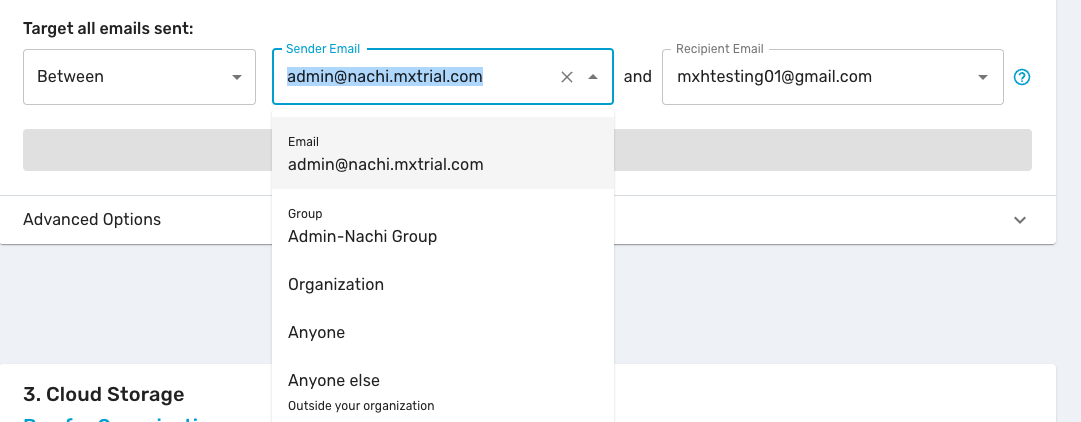
5 - In Step 2, pick “Emailflow” button and set the Sender and Recipient. 
You can also select if the communication should be uni or bi-directional by selecting “From” or “Between”.

Notice in the “Sender” and “Recipient” fields, you also can input any valid email; domain; and even tags (if you have tagged some accounts in our Accounts and Groups section).
After finishing, click confirm
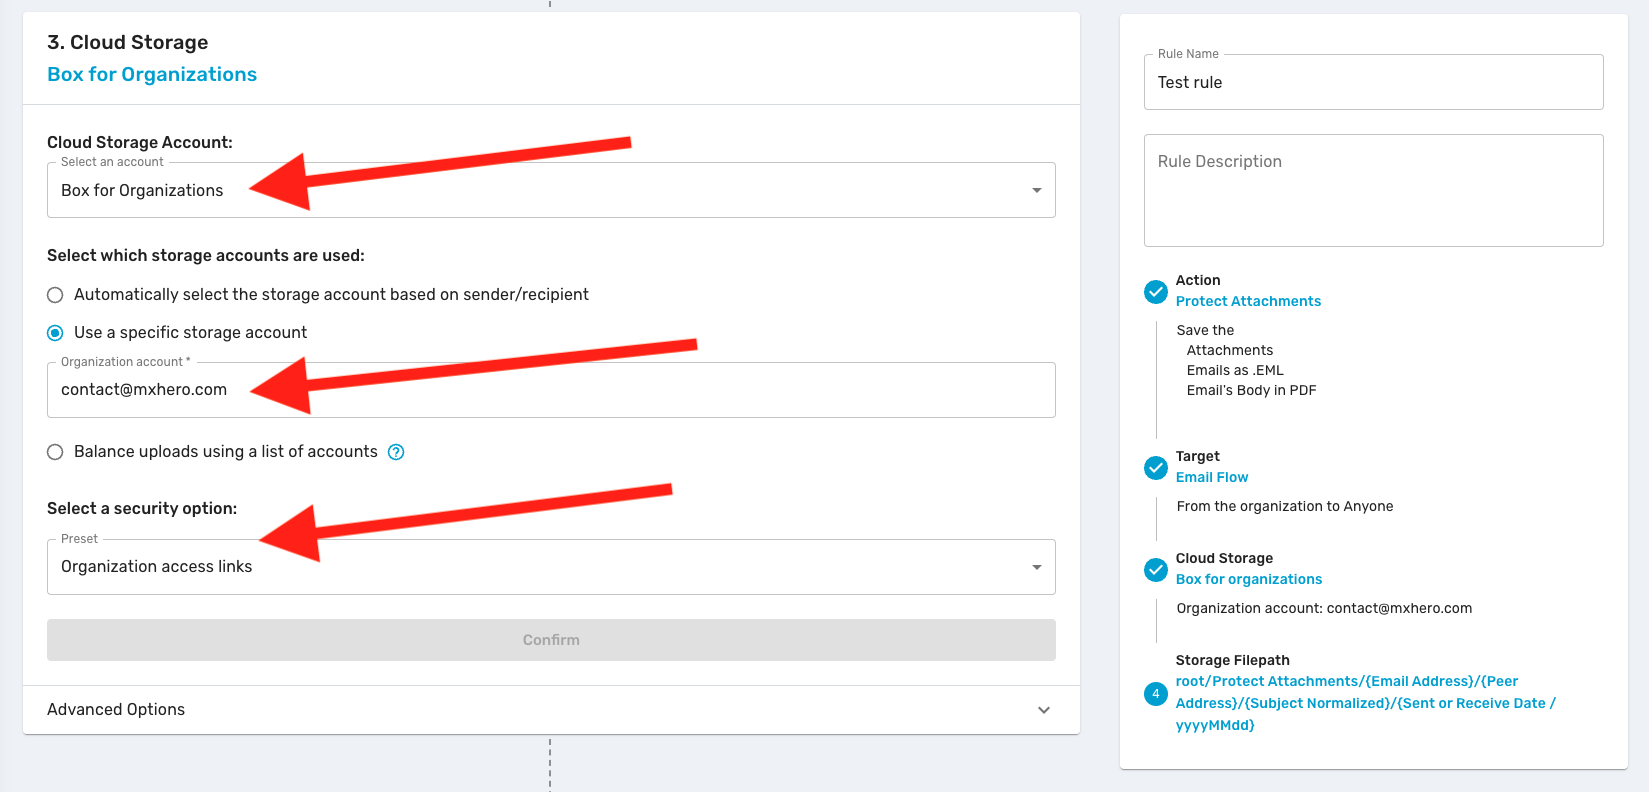
6 - In Step 3, click the dropdown and choose your Cloud Storage. You can also select a specific storage account and manage your security options. Then confirm

7 - Finally in Step 4 You can specify the path in your Cloud Storage where the processed files will be uploaded.
If you choose Pick from storage option, you will be able to select a specific path or folder directly in your cloud storage.
After finishing, confirm and give a name to your rule (this is obligatory).
Finally, save you rule
Now you will find your active rules in your main screen
You are all set!