Tutorial: How to create your first Mailbox rule
To run your first rule, click "Create a Rule" in the left menu bar.
%2017.17.55.png)
Choose the action you wants to perform, then click "Start Rule Creation" button
(In this example we'll be covering the process for a "Copy Email" action, but is exactly the same for any other action)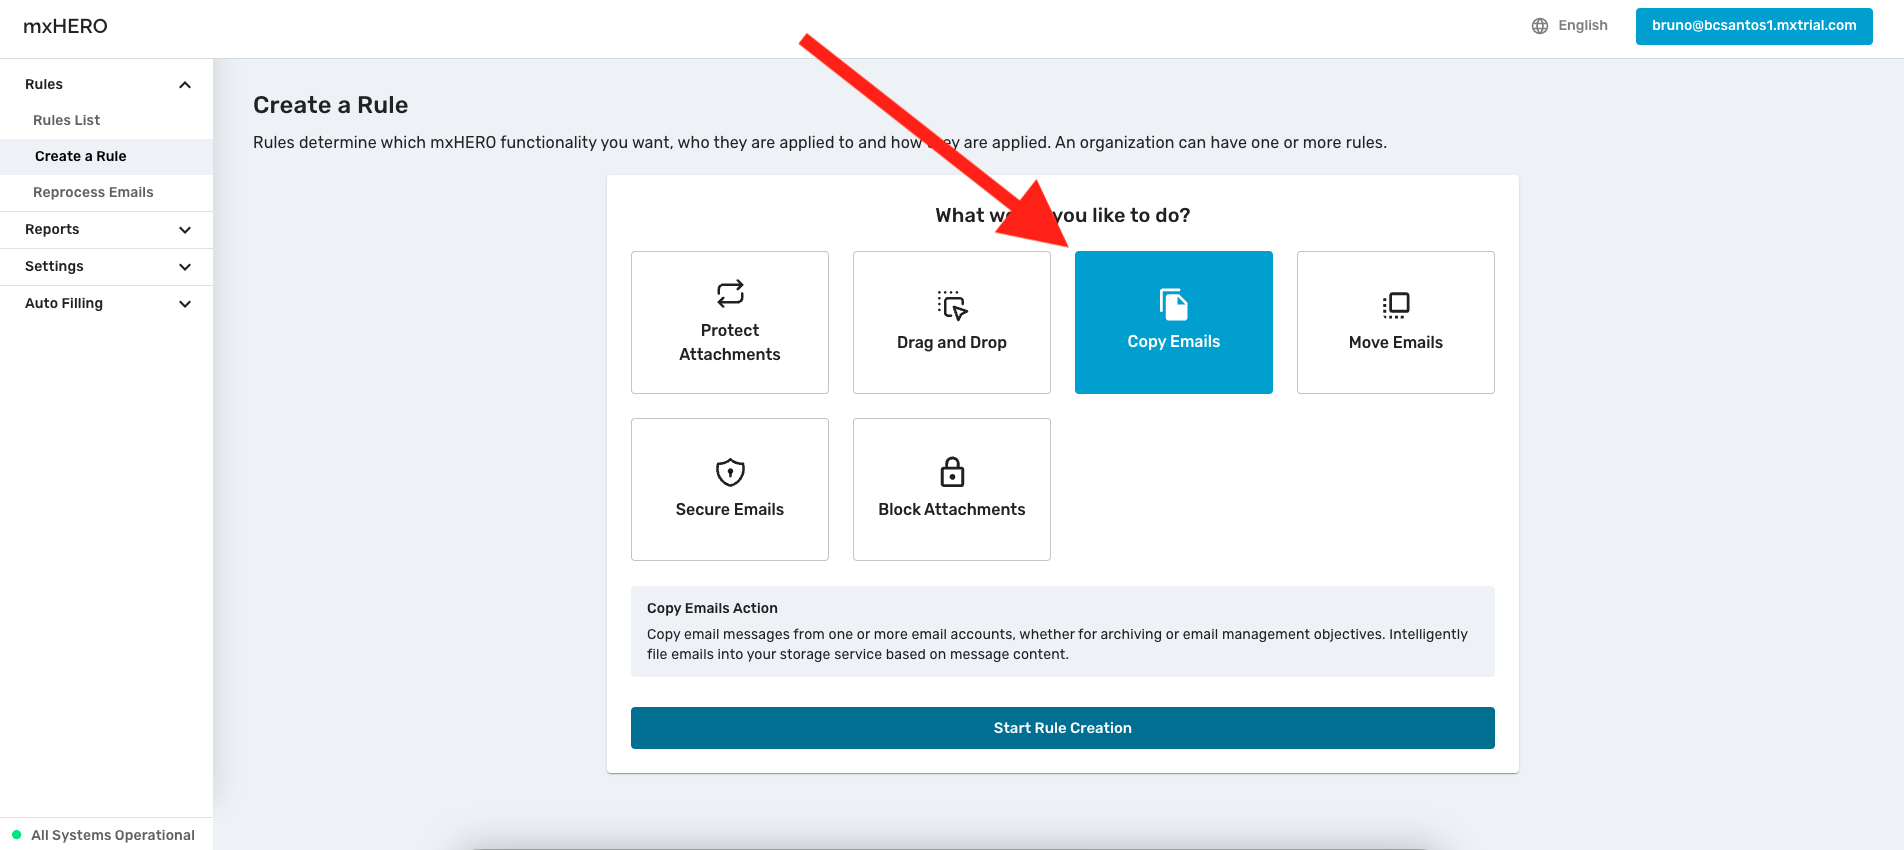
In the next screen, select what you want to save (.EML, PDF and/or attachments) by clicking the corresponding buttons and confirm.%2017.18.56.png)
%2017.19.10.png)
In Step 2, click "User Mailboxes" (This is the new Emailsync App)
%2017.19.30.png)
Now click "Choose a server" dropdown and select yours
%2017.20.32.png)
Here you can select the accounts you need.
Notice you can select all the accounts in your Organization, specific accounts or even "Tagged" accounts (if you have assigned Tags in Accounts and Groups section)
(In this example we'll be choosing only one specific account)
%2017.20.53.png)
Once done, select the time range you want to target. Notice you could choose single or continuous runs
%2017.21.14.png)
You may need to target a specific folder instead your entire Inbox, If this is the case, click "Add Filters" button
%2017.21.51.png)
Here You may add inclusions/exclusions to the rule, and you can also include/exclude specific folders to be targeted
%2017.22.10.png)
In Step 3, click the dropdown and choose your Cloud Storage, then confirm
%2017.22.28.png)
Finally in Step 4 You should specify the path in your Cloud Storage where the processed files will be uploaded
%2017.23.38.png)
Confirm and Save the Rule
%2017.24.01.png)
You are done!. The new created rule must be on top of your list
%2017.34.33.png)
If you need to check the progression of a particular rule, just click on that rule. The rule banner will open and will show you the details
%2017.34.00.png)